DIY Typography Dresser Makeover

One of the fun things about living back in NC is being able to connect with and reinvent family traditions and heirlooms. Today's post is about a yellow dresser that used to belong to my parents and has done hard time - 11 years to be exact - in storage in my aunt's garage. You may remember that Gus and I saved the garage recently, and in that - you may have spotted the guest star for today - my mom's yellow dresser!
When Gus and I got our own place, we were a bit short on furniture (after we sold practically everything!) so this came with us. All things considered, it's in great shape, with all the original hardware and made of solid wood. The color was okay but it needed some updating.
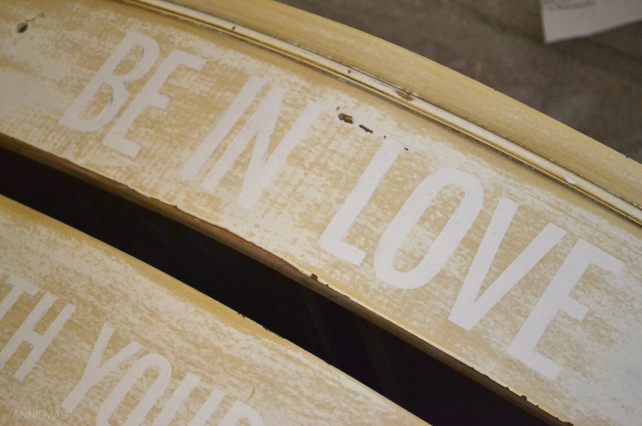
So I started thinking, since this would go in our bedroom, what would I want to see everyday when I woke up? And I thought of this great quote by Jack Kerouac. I could tell you, but let me show you --

Boom! Graphic Black, Gold, and awesome typography: some of my all time favorites. This treatment brought new and exciting life to the dusty yellow dresser.
Here's a rundown of how we did it.
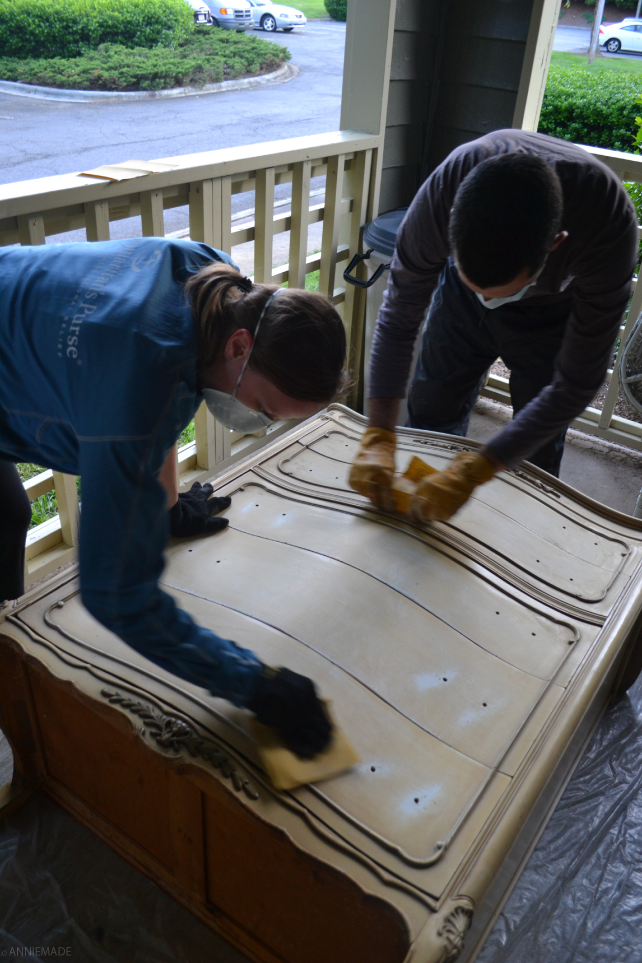
Firstly, we (and our dear friend Chrissy) removed the hardware and sanded the original dresser down.
Then I measured all the drawers and created a facsimile in the computer. I laid out all the text for the quote in the computer, then printed each phrase on a strip of adhesive contact paper.

This was fairly successful. The thing is that the contact paper didn't create a great surface for the ink so it smeared a lot, but it still provided me enough of a template to work with (albeit smudgy). This probably would have worked better with a laser printer.. and would have avoided the next step if I had a cricut machine or something similar. Maybe for Hanukkah.
Anyway...

Off I went cutting out something like 26 letters with an exacto knife to act as our stencils. Then I peeled them all back and adhered them where I wanted them on each of the pre-sanded drawers. I made sure to press firmly to ensure the stencil would work when the paint stage came.
Next came some fun - painting! I used plain old latex flat paint in a dark gray/black color and we did two coats (allowing each to dry inbetween).

As soon as the painting was done, I pulled up all of the letters. This is key, just as you would peel up painting tape before it completely dries and leaves uneven lines. There were a few little spots which were easily cleaned up with a little sandpaper.

Once the letters were revealed, we used sandpaper to give the dresser that vintage feel. We lightly sanded the areas with a lot of detail, revealing the yellow or gold ornamentation beneath.
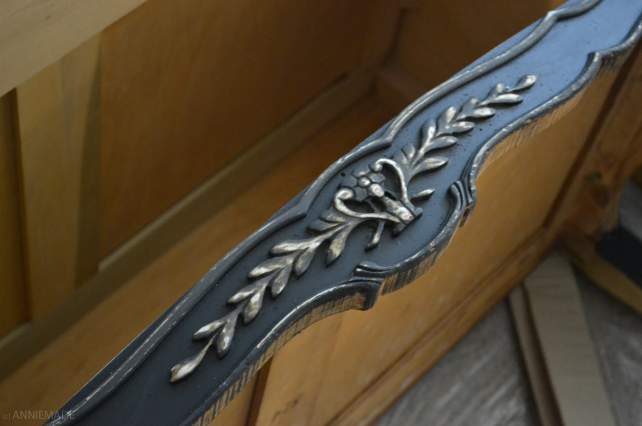
The last step was a coat of Minwax Finishing Paste to seal everything. This was applied with a cloth rag and a lot of TLC (thanks honey).

And there you have it... a wonderful reminder to wake up to everyday, even better because it's a new chapter for this special piece.

